
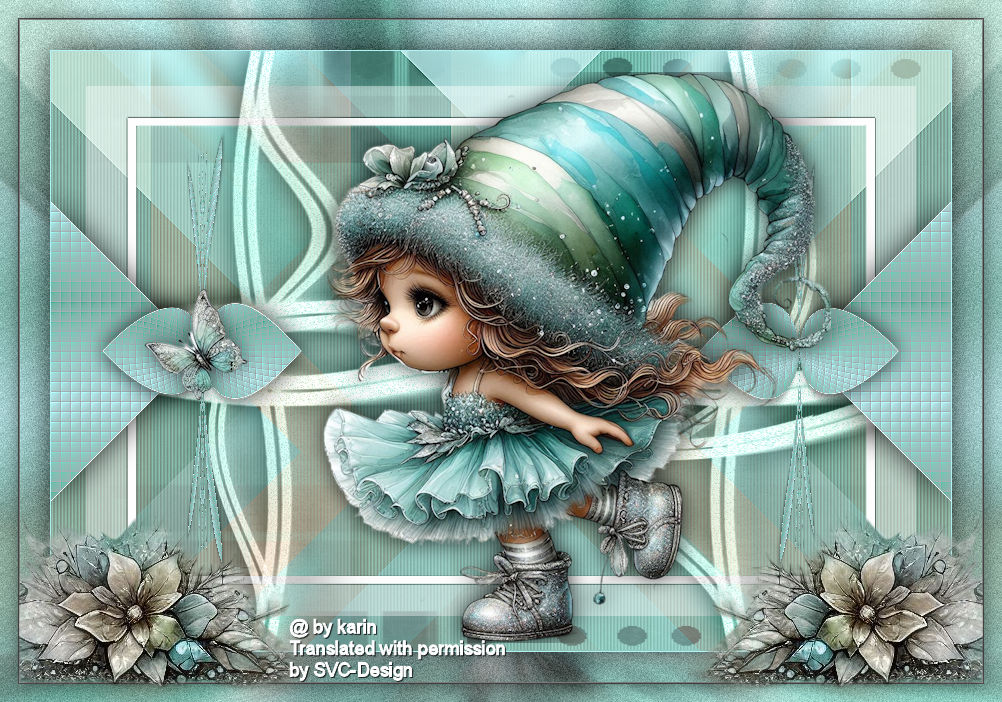
This lesson is made with PSPX9
But is good with other versions.
© by SvC-Design

Materialen Download :
Here
******************************************************************
Materials:
Butterfly_DK
Corel_09_018
Flowers_DK
Little Fairy_DK
Littlesweetone_kleur
NarahsMasks_1614
Raster1
suus2 mask
******************************************************************
Plugin:
no
******************************************************************
color palette
:

******************************************************************
methode
When using other tubes and colors, the mixing mode and / or layer coverage may differ
******************************************************************
General Preparations:
First install your filters for your PSP!
Masks: Save to your mask folder in PSP, unless noted otherwise
Texture & Pattern: Save to your Texture Folder in PSP
Selections: Save to your folder Selections in PSP
Open your tubes in PSP
******************************************************************
We will start - Have fun!
Remember to save your work on a regular basis
******************************************************************
1.
Open a new transparent image of 900 x 600.
2.
Set your Foreground color to color 1 and Background color to color 2.
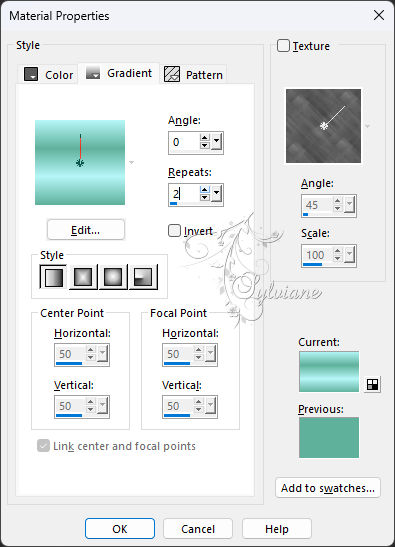
Fill with the following gradient.
3.
Selections - Select all.
Layers - New raster layer.
4.
Open Little Fairy_DK
Edit – Copy
Edit - Paste into selection
5.
Selection - Select None
6.
Effects - Image Effects - Seamless Tiling - default
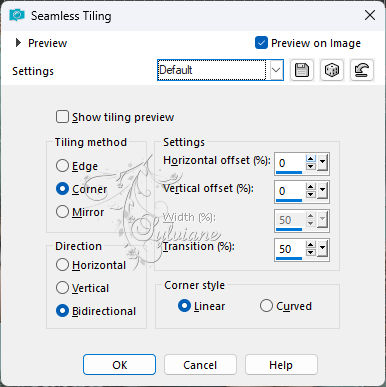
8.
Adjust - Blur - Gaussian Blur at 15
9.
Effects - distortion effects - pixelate
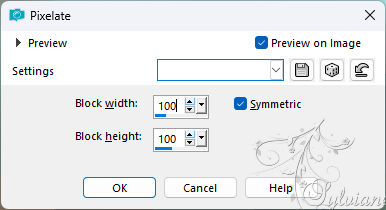
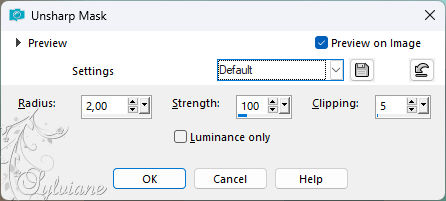
10.
Adjust - sharpness - unsharp mask - default
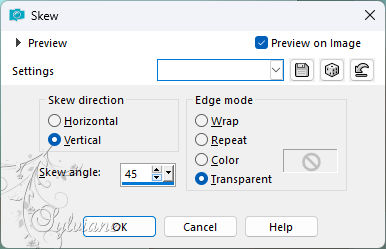
11.
Effects - Geometric effects - Skew
12.
Layers - Duplicate
13.
Image - Mirror - Mirror horizontally
14.
Layers - Merge - Merge down
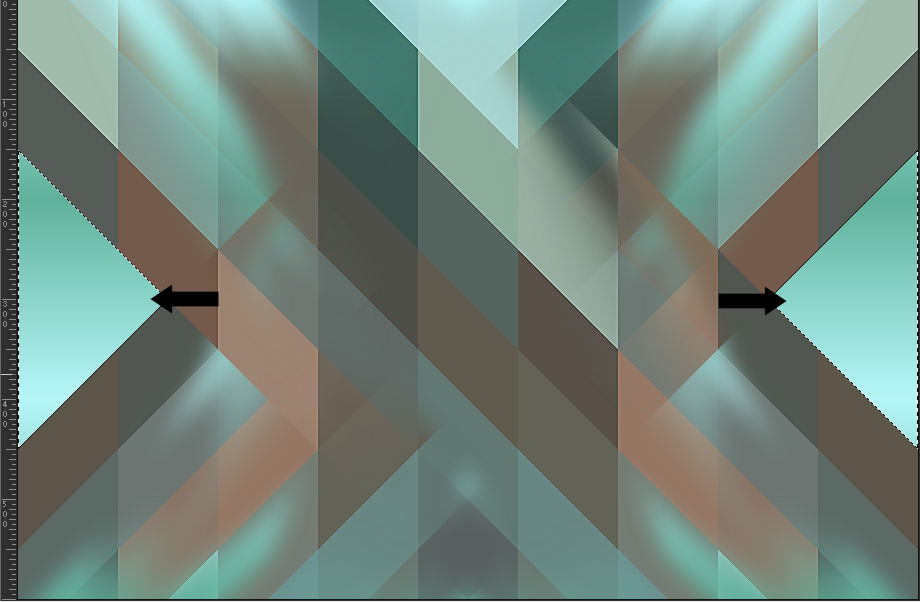
15.
Activate your magic wand and click in the 2 triangles to select
16.
Layers - New raster layer
17.
Fill both triangles with your gradient
18.
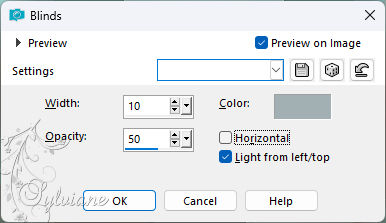
Effects - Texture Effects – Blinds - color on 3
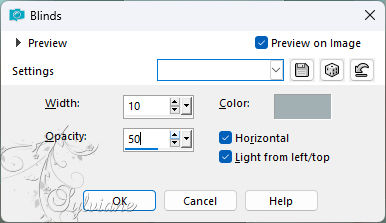
19.
Effects - Texture Effects – Blinds - color on 3 - Uncheck horizontal
20.
Effects - Edge Effects - Enhance
21.
Selection - Select None
22.
Effects - 3D Effects - Drop shadow
0/0/80/ 45 – color: Black
23.
Layers - Duplicate
24.
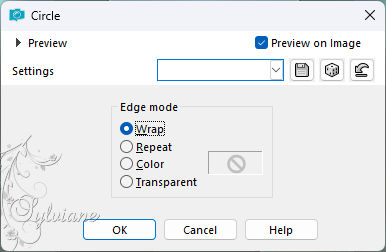
Effects - Geometric effects - Circle
25.
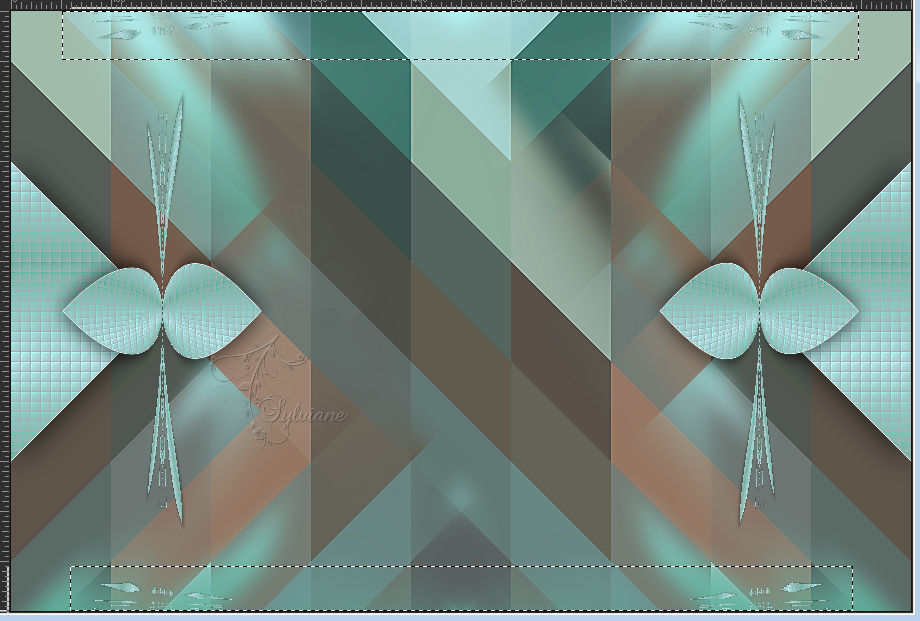
Select the red highlighted parts as example and press delete
26.
Selection - Select None
27.
Activate Raster 2
28.
Layers - New raster layer
flood fill with color 1.
29.
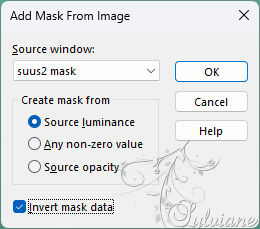
Layers - New Mask Layer - From Image - suus2 mask
30.
Layers - Merge - Group merge
31.
Effects - Image Effects - Seamless Tiling - side by side
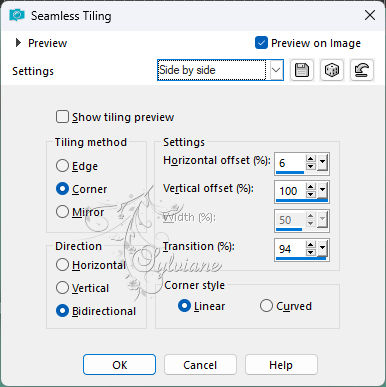
32.
Adjust - sharpness - unsharp mask- default

33.
Layers - Properties - Blend mode set to Screen
34.
Effects - Texture effects - Texture - Find Raster 1
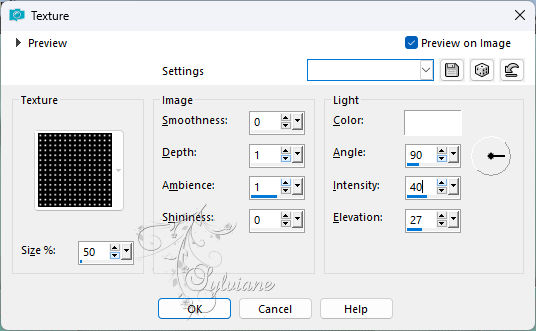
35.
Layers - New raster layer
Fill with color 4
36.
Layers - New Mask Layer - From Image - NarahsMasks_1614
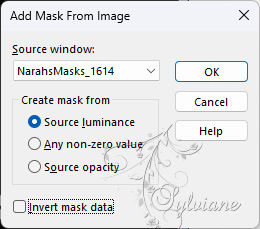
37.
Layers - Merge - Merge Group
38.
Effects - Distortion Effects - Wave
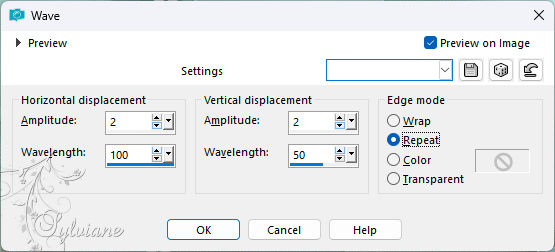
39.
Activate selection tool (Press K on your keyboard)
And enter the following parameters:
Pos X : -116 – Pos Y : 0
Press M.
40.
Layers - Duplicate
41.
Image - Mirror – mirror Horizontal
42.
Layers - Merge - Merge down
43.
Layers - Duplicate
44.
Activate Group - Raster 4
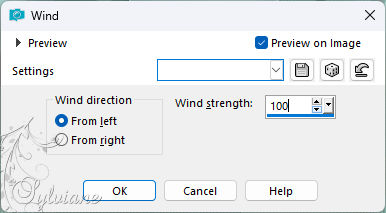
45.
Effects - Distortion Effects - Wind - From Left - 100
46.
Activate Copy of Group - Raster 4
47.
Layers - Merge - Merge Down
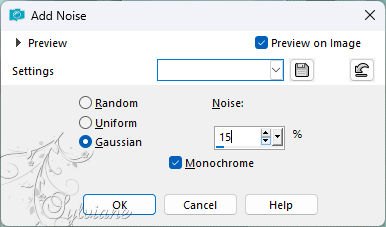
48.
Adjust - Add / Remove Noise - Add Noise
49.
Layers - Duplicate
50.
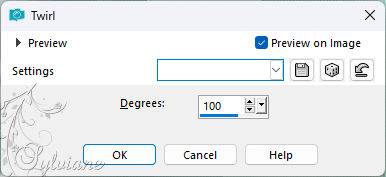
Effects - Distortion effects – Twirl at 100
51.
Layers - Merge - Merge down
52.
Adjust – one step photo fix
53.
Layers - Properties - Blend mode on Luminance (legacy)
54.
Effects - 3D Effects - Drop shadow
0/ 0 /80/ 45 – color: Black
55.
Activate Group - Raster 4
56.
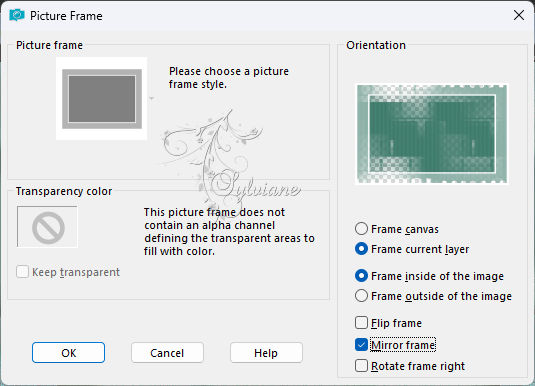
Image - Picture frame - Find picture frame Corel_09_018
57.
Selections - Select all
58.
Selection - modify - contract – 35px
59.
Selections - Invert
60.
Edit – clear
61.
Selection - Select None
62.
Effects - Edge Effects - Enhance
63.
Open Little Fairy_DK
Edit - Copy
Edit - Paste as new layer
Layers – arrange – bring to top
format change if necessary
Optionally a drop shadow
64.
Image - Resize with 70%.
No check mark on resize all layers
Move a little to the left and down.
65.
Open Butterfly_DK
Edit - Copy
Edit - Paste as new layer
66.
Image - Resize with 70%.
No check mark on resize all layers
Place left on the 2 leaves in the middle.
67.
Effects - 3D Effects - Drop shadow
0/ 0/ 60/30 – color:Black
68.
Image - Add Borders – Symmetric - 1 pix color 2
69.
Selections - Select all
Edit - Copy
70.
Image - Add Borders – Symmetric - 50 pix color 2
71.
Selections - Invert
Edit - Paste into selection.
72.
Adjust - Blur - Radial blur
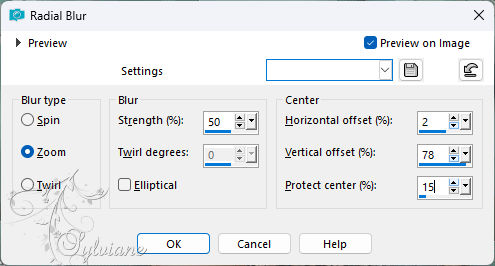
73.
Selections - Invert
74.
Effects - 3D Effects - Drop shadow
0/ 0/80/45 – color: Black
75.
Selections - Invert
76.
Adjust - Add / Remove Noise - Add Noise - still stands good.
77.
Selections - Select all
76.
Selection - modify - contract – 20px
77.
Effects – 3D effects – chisel- color:white
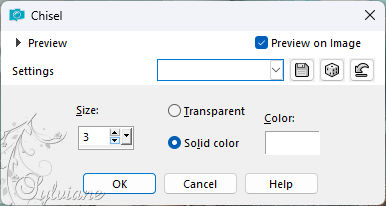
78.
Effects - 3D Effects - Drop shadow
0/ 0/ 60/30 – color: Black
79.
Selection - Select None
80.
Open Flowers_DK
Edit - Copy
Edit - Paste as new layer
and move to the lower left as above
81.
Layers - Duplicate
82.
Image - Mirror – mirror Horizontal
83.
Place your name or watermark
84.
Image - Add borders - Symmetric - 1 pix color 2
85.
Save as JPEG
Back
Copyright Translation 2024 by SvC-Design
------------------------------------------------------------------------------
Thanks to all who created